
Hi maker..! Welcome back to the RenderWrench 3D Printing Series.
Hope you’re doing great — let me know in the comments how your last print turned out!
In the previous post, we learned what 3D printing is and how it works. Now it’s time to dive a little deeper. You may have heard terms like FDM, SLA, and SLS — but what do they really mean, and which one is right for your project?
Well, not all 3D printers work the same way. Some melt plastic filaments, some cure liquid resin, and others fuse powder with lasers! In this post, we’ll break down these three most common 3D printing technologies — FDM, SLA, and SLS — and help you understand which one fits your design or prototype best.
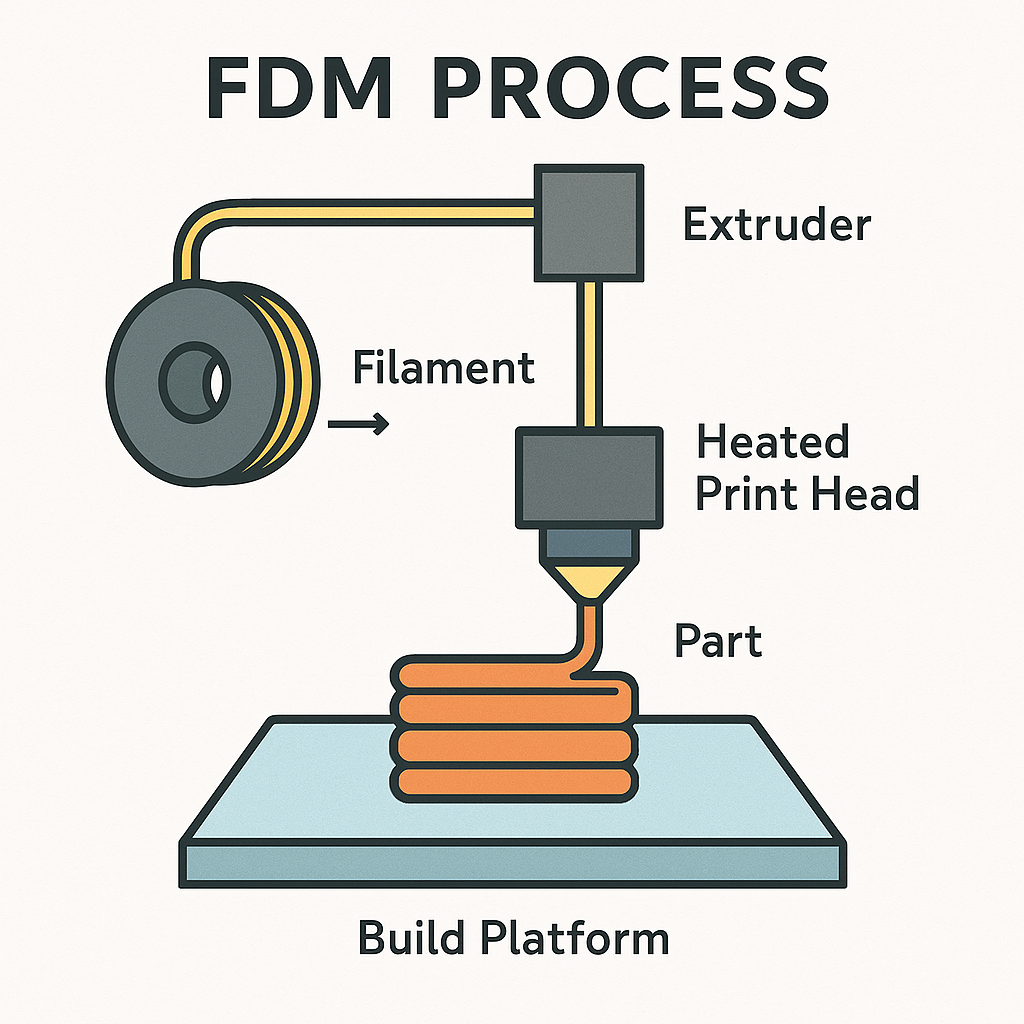
FDM (Fused Deposition Modeling) — The Maker’s Favorite
If you own a desktop 3D printer, chances are it’s an FDM printer.
In this process, a thermoplastic filament (like PLA, ABS, or PETG) is heated and extruded through a nozzle. The printer deposits melted plastic layer by layer on a heated build plate to create your part.
This technique is the most popular and affordable 3D printing process available today — perfect for makers, engineers, and students.
Advantages:
- Budget-friendly and easy to operate.
- Huge range of filament types and colors.
- Ideal for functional prototypes, jigs, and mechanical parts.
- Minimal post-processing — most parts are usable right off the bed.
Limitations:
- Visible layer lines — not great for smooth surface finishes.
- Requires supports for overhangs or complex shapes.
- Slightly lower dimensional accuracy than resin-based methods.
Best For:
Prototypes, mechanical parts, brackets, DIY projects, enclosures, and tools.
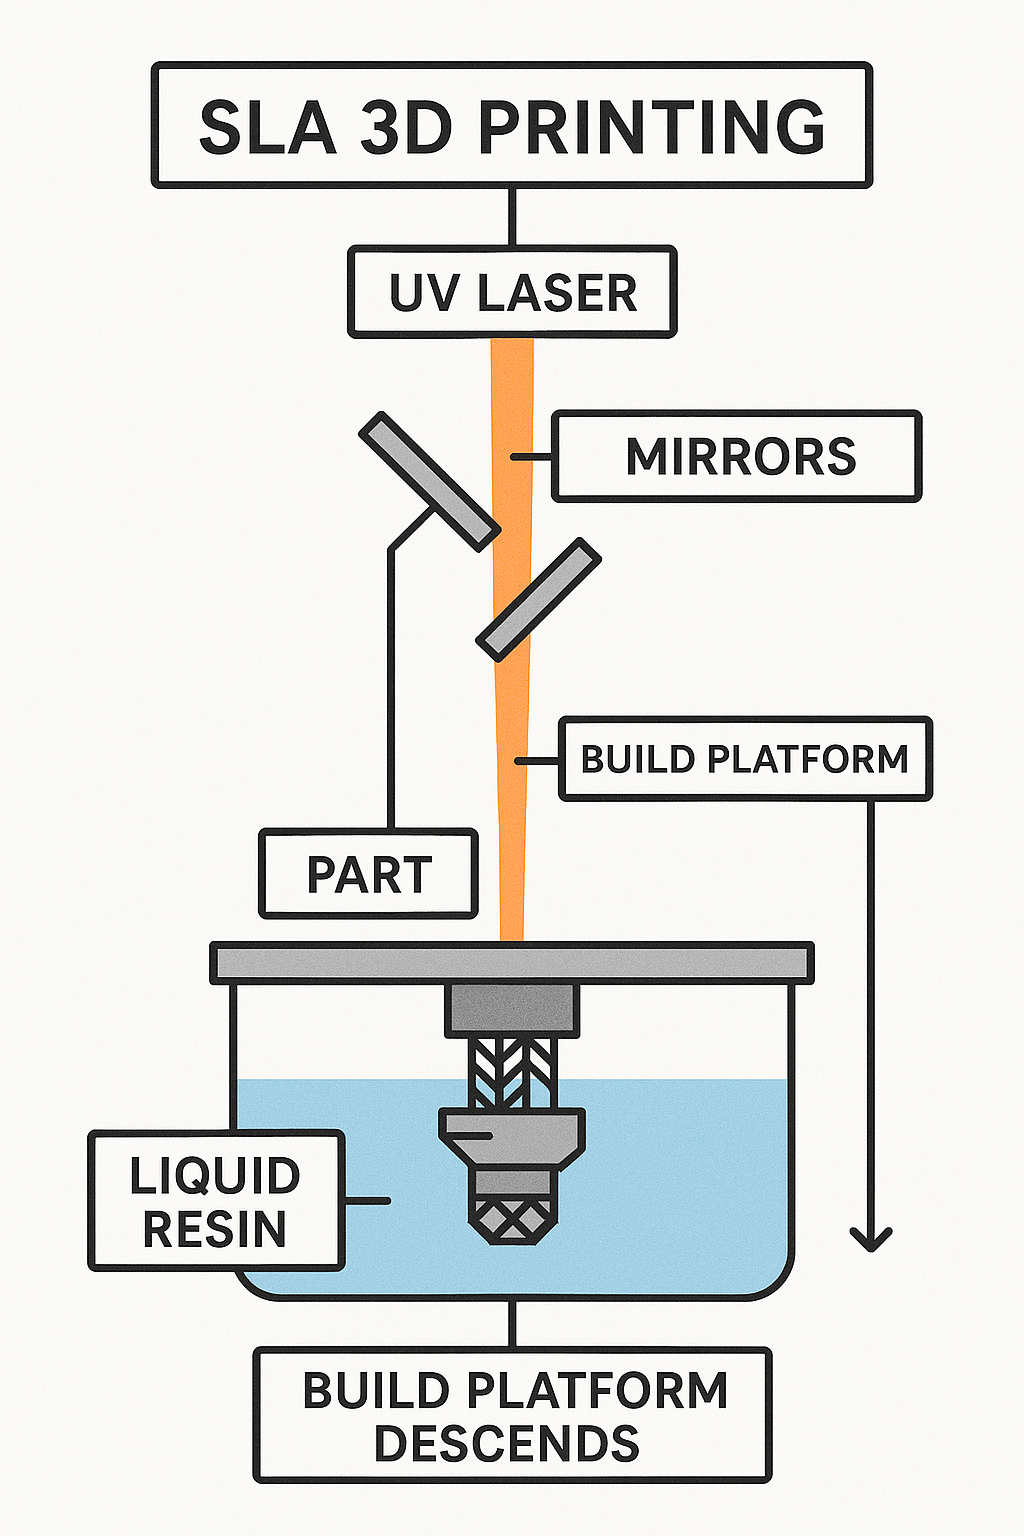
SLA (Stereolithography) — The Artist of 3D Printing
Now, if you’ve ever seen a small, glossy, highly-detailed 3D print — that’s SLA printing.
SLA printers use a UV laser or LCD light source to cure liquid resin into solid layers. The build platform lifts gradually as each layer hardens inside the resin vat.
This process is known for its exceptional precision and surface smoothness, which makes it the go-to choice for designers and artists.
Advantages:
- Ultra-smooth surface finish.
- High dimensional accuracy — excellent for detailed models.
- Perfect for miniature, jewelry, dental, and aesthetic models.
Limitations:
- Resins can be expensive and sometimes brittle.
- Post-processing (washing and UV curing) is mandatory.
- Can be messy and has a noticeable odor.
Best For:
Small, intricate models; design validation prototypes; dental molds; and jewelry casting.
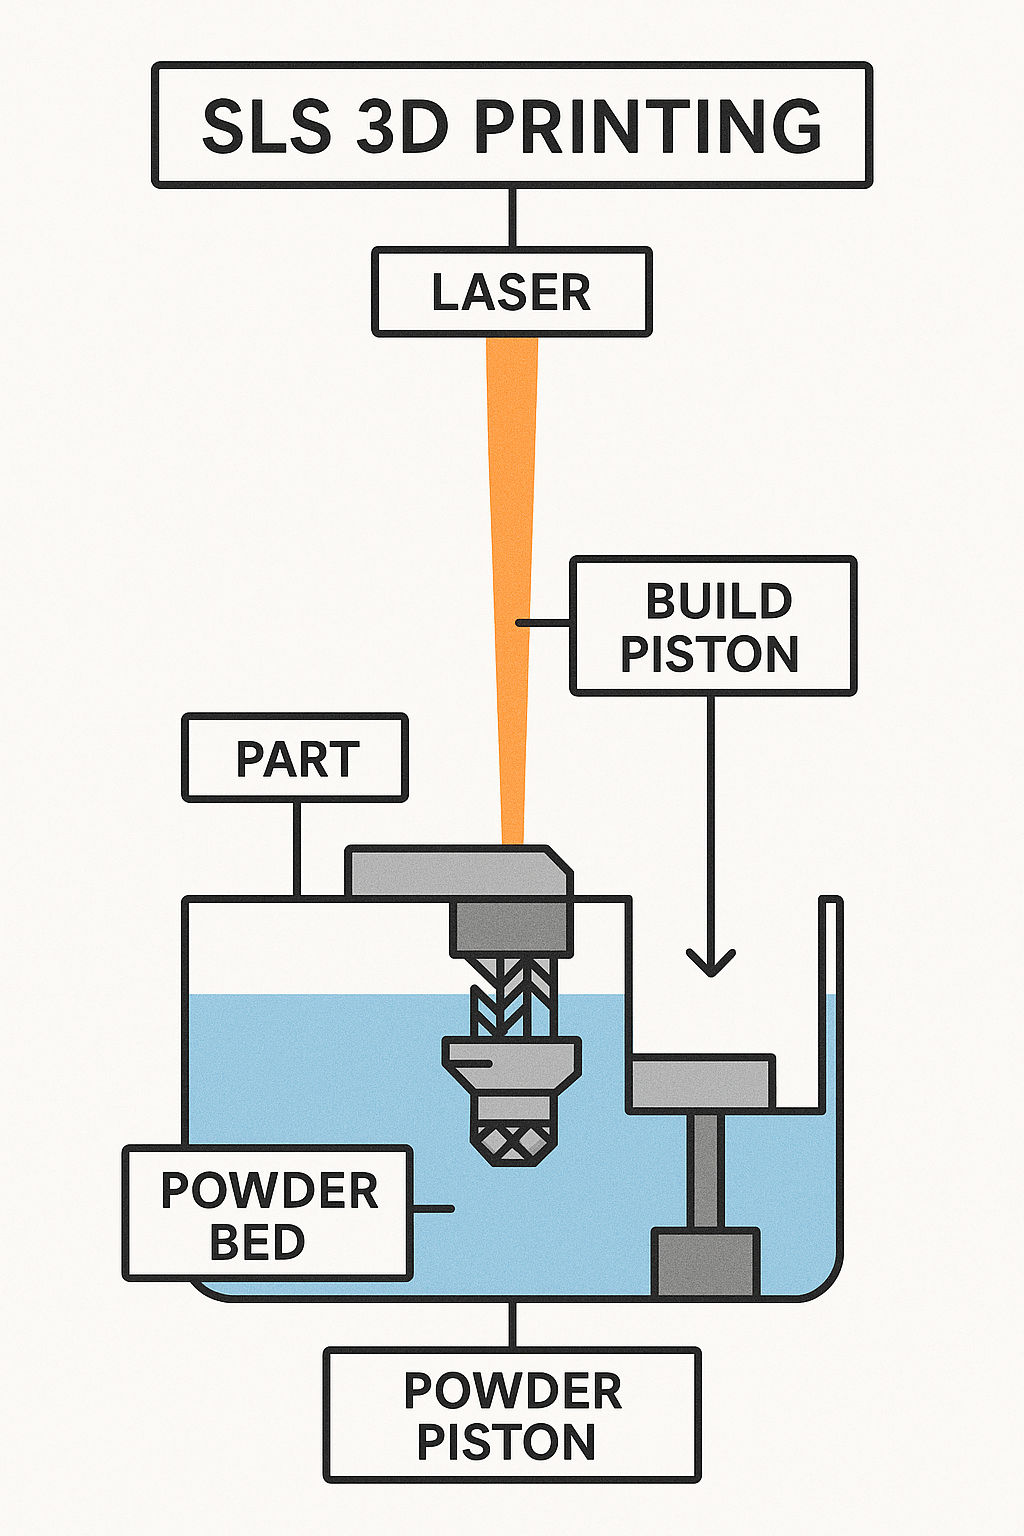
SLS (Selective Laser Sintering) — The Industrial Powerhouse
SLS takes 3D printing to a professional level.
Instead of filaments or resins, SLS uses powdered materials like nylon, glass-filled nylon, or composite powders. A high-powered laser selectively fuses these powder particles together layer by layer.
The biggest advantage? The surrounding powder supports the print — meaning no support structures are required!
Advantages:
- Excellent mechanical strength and durability.
- No support structures needed.
- Great for complex and interlocking geometries.
- Ideal for functional end-use parts and low-volume production.
Limitations:
- Industrial-grade — expensive printers and materials.
- Rougher surface finish compared to SLA.
- Requires powder handling and safety precautions.
Best For:
Functional mechanical parts, drone frames, robotic arms, gear housings, and industrial prototypes.
Comparison at a Glance
| Feature | FDM | SLA | SLS |
|---|---|---|---|
| Material | Thermoplastic filament (PLA, ABS, PETG) | Liquid resin | Nylon or composite powder |
| Accuracy | Medium | Very high | High |
| Surface Finish | Visible layers | Smooth and glossy | Matte, slightly rough |
| Strength | Good | Moderate | Excellent |
| Cost | Low | Medium | High |
| Post-Processing | Minimal | Required (wash & cure) | Minimal |
| Supports Needed | Yes | Yes | No |
| Ideal For | Prototypes, DIY, functional parts | High-detail models | Industrial-grade functional parts |
How to Choose the Right Printing Type
Choosing the right printing process depends on what you need from your print.
| Your Goal | Recommended Type |
|---|---|
| Fast, affordable prototyping | FDM |
| High detail and smooth finish | SLA |
| Strong, functional parts | SLS |
Here’s a quick way to decide:
- If you’re just starting and want something easy → go with FDM.
- If you’re into fine details and presentation → choose SLA.
- If you need high-performance, durable parts → use SLS.
Each technology has its strengths — it’s all about matching your design goal with the right method.
Real-World Use Cases
- FDM: Robotic brackets, camera mounts, jigs, DIY parts, enclosures.
- SLA: Product design prototypes, dental models, miniatures.
- SLS: Aerospace components, gear housings, mechanical joints.
So, no matter if you’re printing a small custom knob or an industrial-grade gear assembly — there’s a 3D printing technology tailored for your needs.
Summary
Let’s recap what we learned:
- FDM = Best for functional and affordable prints.
- SLA = Best for smooth, detailed, and aesthetic prints.
- SLS = Best for high-performance, industrial-grade parts.
Each has its place in modern engineering, design, and prototyping.
The real magic lies in knowing which one fits your project best.
And that wraps up this post!
Hope you now have a clear idea of how these 3D printing technologies differ — and which one suits your next build.
In the next post of the RenderWrench 3D Printing Series, we’ll dive deeper into types of infill used in 3d prints, FDM printing setup, slicer parameters, and how to get perfect first layers every time.
So, stay tuned, bookmark this page, and follow RenderWrench on social media to get updates whenever a new post drops.
Happy printing, and as always — Happy Making!


Pingback: PLA vs ABS vs PETG: Don’t start 3D Printing Until You Read This Filament Guide (RenderWrench 3d Printing Series #3) - RenderWrench
Pingback: 3D Printing Explained for Beginners: How It Works + Types & Applications (RenderWrench 3D Printing Series #1) - RenderWrench